OBS Instructions and Setup
1. Installation
Navigate to https://obsproject.com/download and download the installer for your operating system. The installation process should be standard to your operating system. No plugins are required. Once it is installed, launch OBS.
2. Initial Configuration Wizard
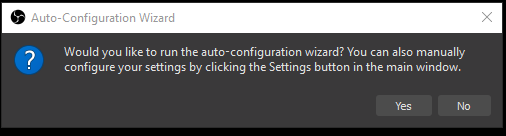
The first thing that appears on launch is the configuration wizard. Click Yes to run it.
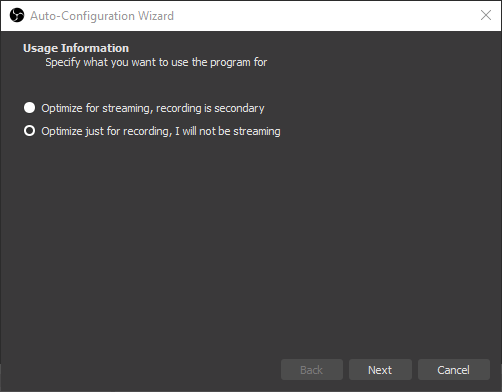
Select Optimize just for recording, I will not be streaming and click Next.
The next screen is video settings. It should default to Use Current and Either 60 or 30. Click Next.

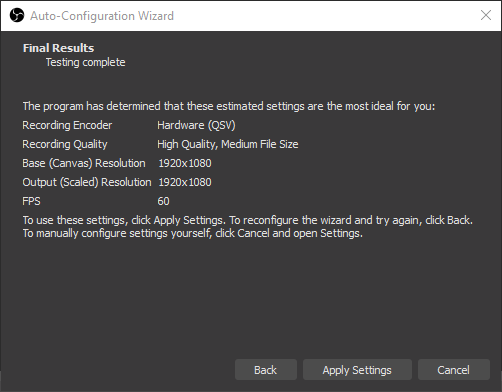
The last screen of the configuration wizard is Final Results. There is nothing to change, so click Apply Settings.
3. Setting the Output Resolution
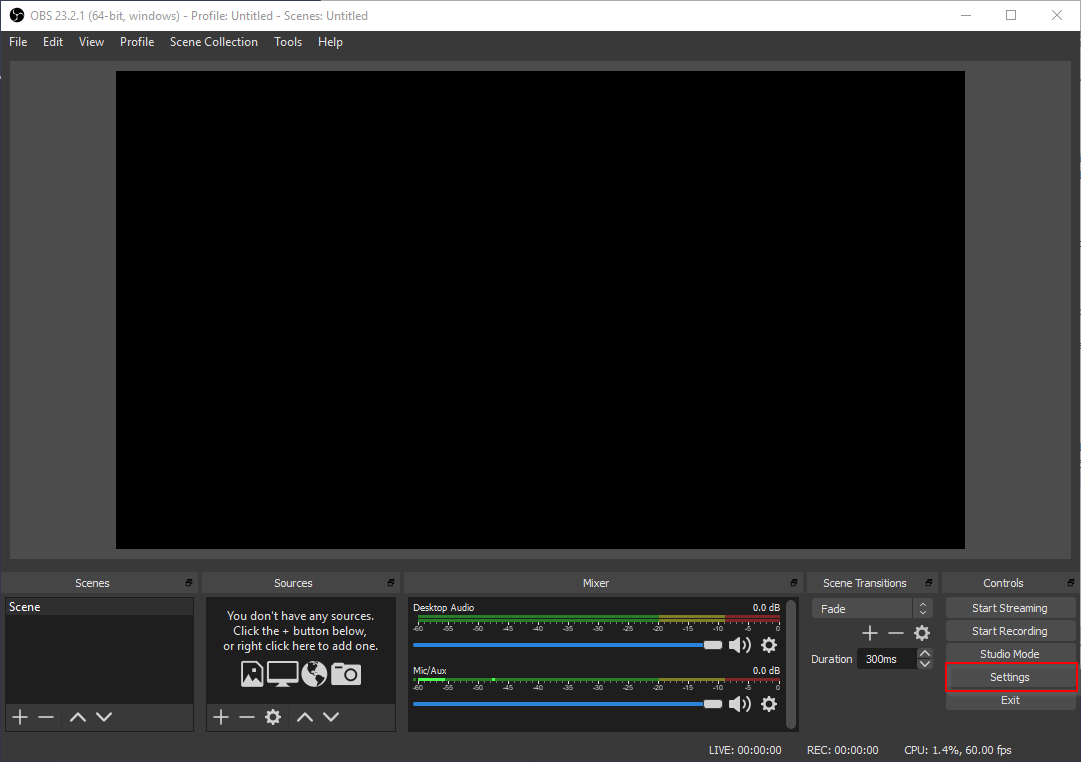
Next we need to go to the Settings near the bottom right of the interface.
In the bar at the left side of the screen, select Video. There will be a setting called Output (Scaled) Resolution. Click the dropdown and you will see a list of screen resolutions, with numbers like 852x480. Select the resolution for which the number on the right-hand side of the x is closest to 480 without being less than 480. Click OK to save the settings.

4. Setting the Video Save Location and Output Format
Again, we must go to the Settings near the bottom right of the interface. In the bar at the left side fo the screen, select Output.
Under the Recording heading, there will be a setting called Recording Path. Click Browse to select a location where your video recordings will be saved. (We suggest choosing your Desktop folder for ease of access; however, you are free to choose whatever folder works best for you.)
Also under the Recording heading, there will be a setting called Recording Format. By default, this setting will be set to mkv; however, that will not work for us, because eCourseware doesn’t allow uploading of MKV files. Click the setting dropdown and select flv to make OBS output your video files in FLV format, which is acceptable to eCourseware.
Click OK to save the settings.
5. Adding Display Capture to Sources
Lastly, click the + button under the heading Sources.
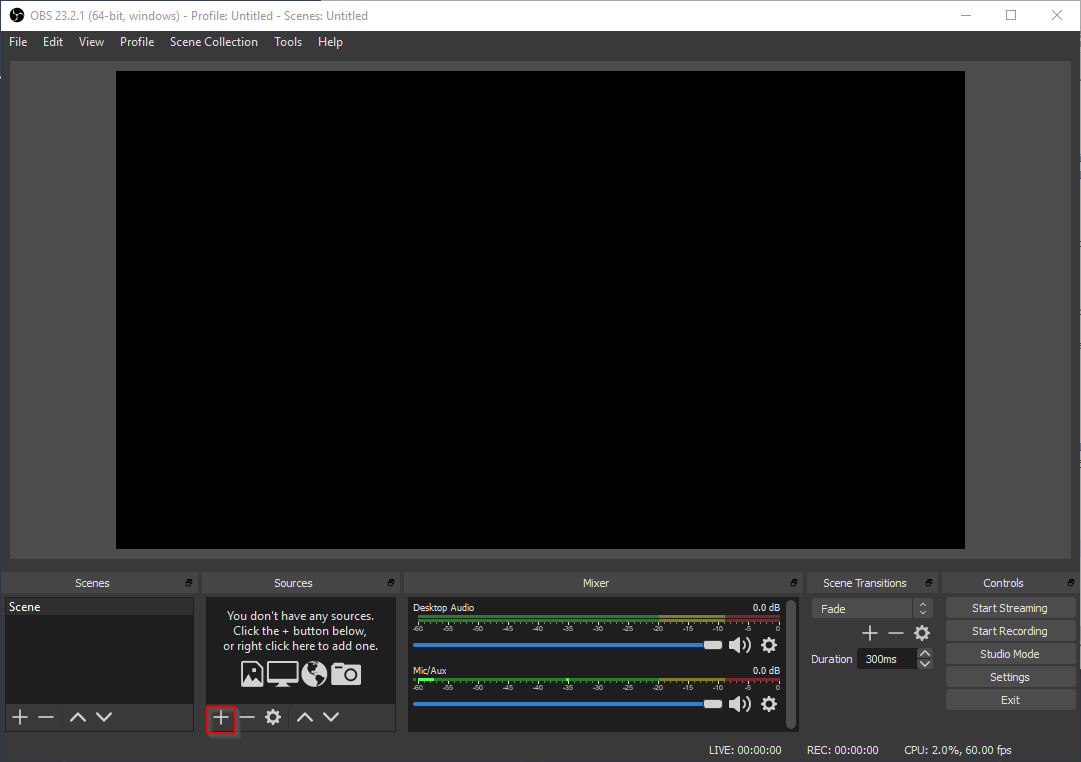
From the popup menu select Display Capture, then click OK in the popup window.
Finally click OK in the larger preview window that appears.

6. Creating a Recording
Near the bottom right of the interface, there are buttons to control recording.
Start Recordingwill begin a new recording. This will create a new.flvfile (to which the recording is being written) in the folder you specified above.Stop Recordingwill end the recording and finalize the.flvfile.
7. VLC for Playing the Video
To play the video that you created, you can install the VLC Media Player.