Demo 10½: Creating a New Model Class to Associate With
In this demonstration, I will lay the groundwork for the upcoming association demos by creating a new model class to association with. The tasks in this demo are similar to the ones covered in the previous demos, and we will continue to build upon on the QuizMe project from the previous demos.
In particular, we will be updating our model design by adding a new model class, Quiz, as depicted in Figure 1.
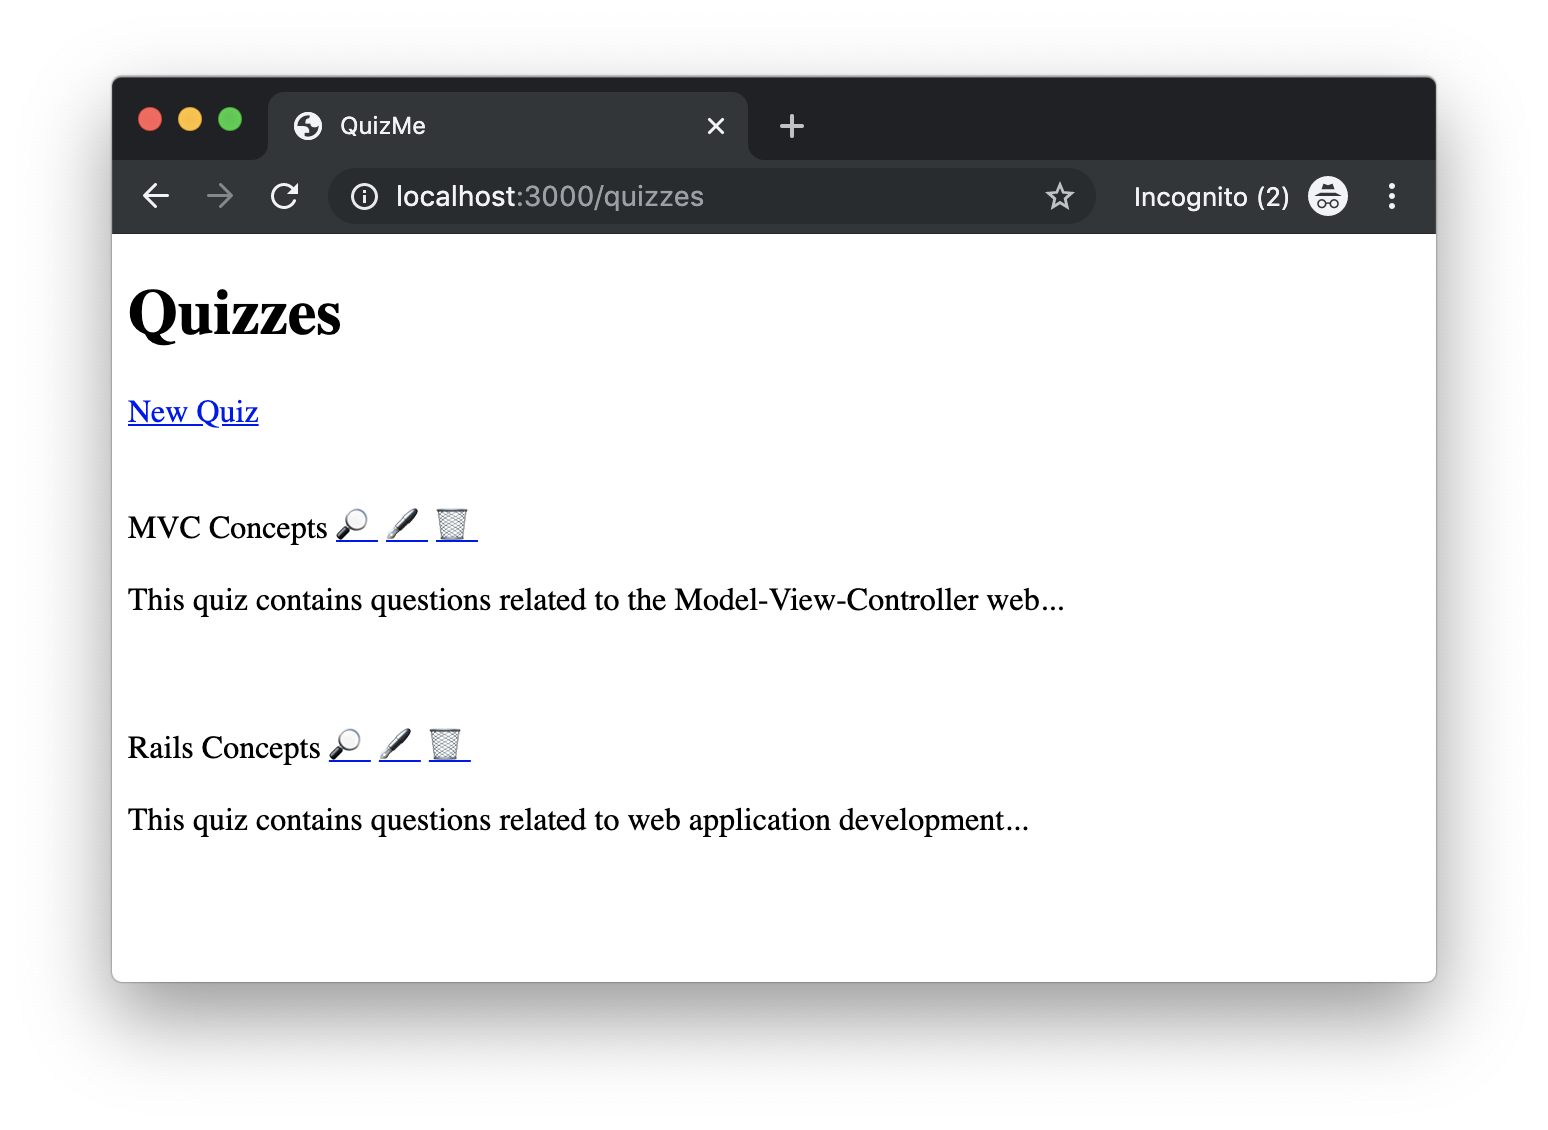
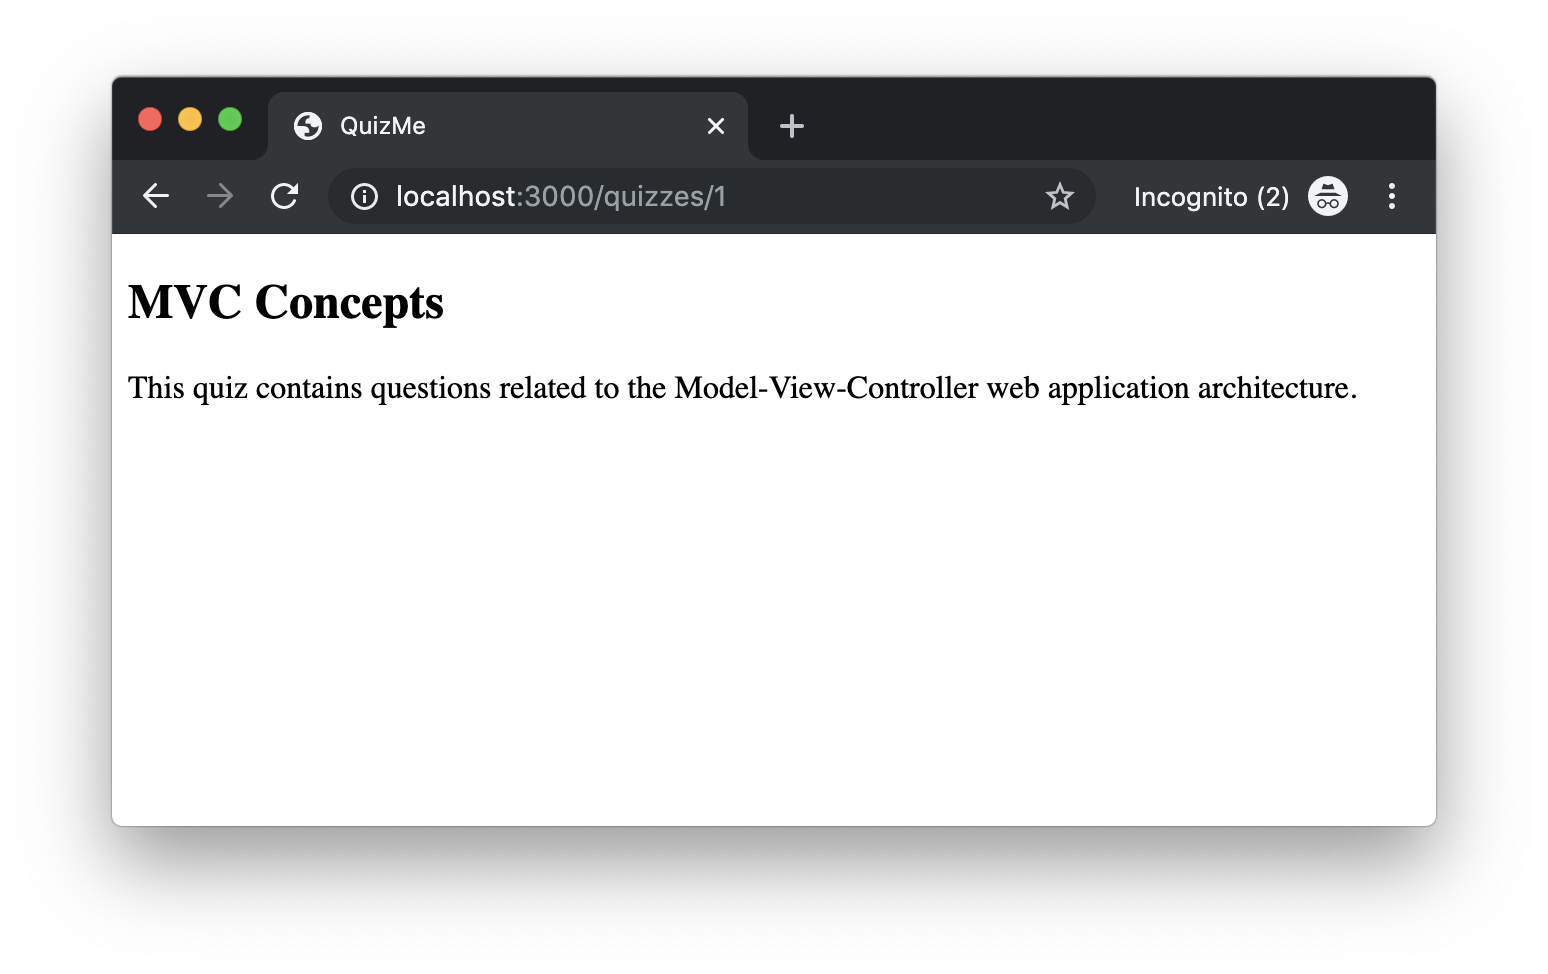
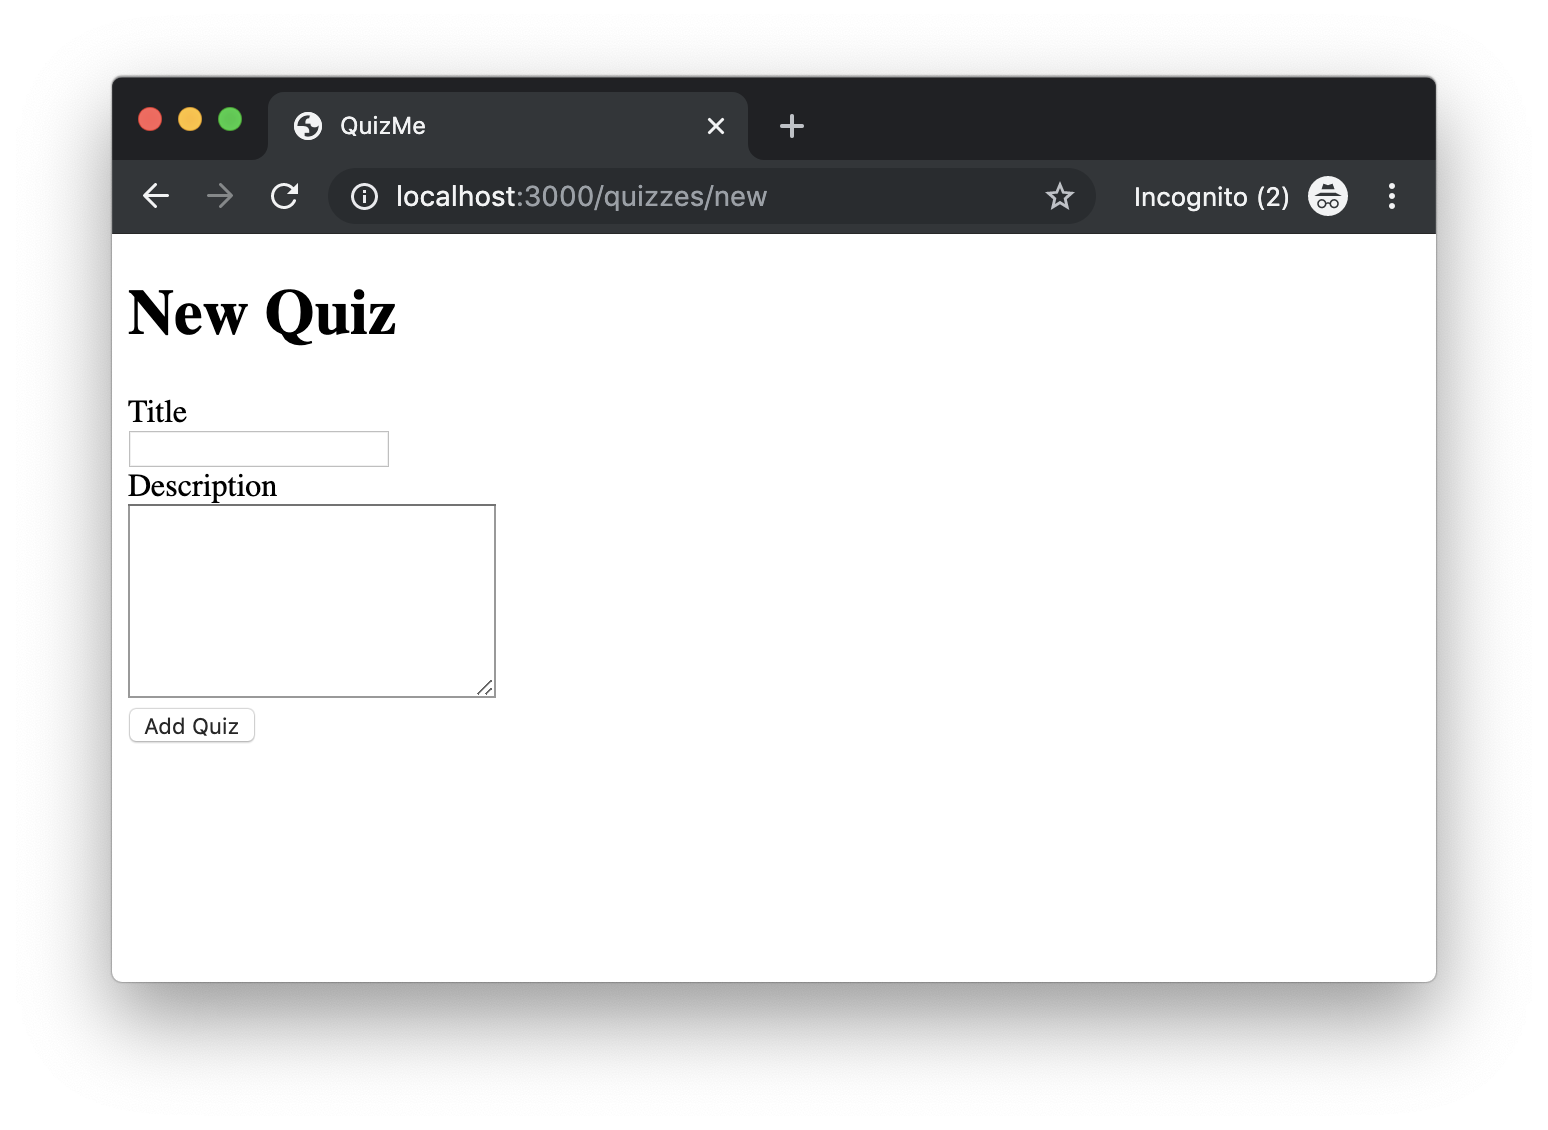
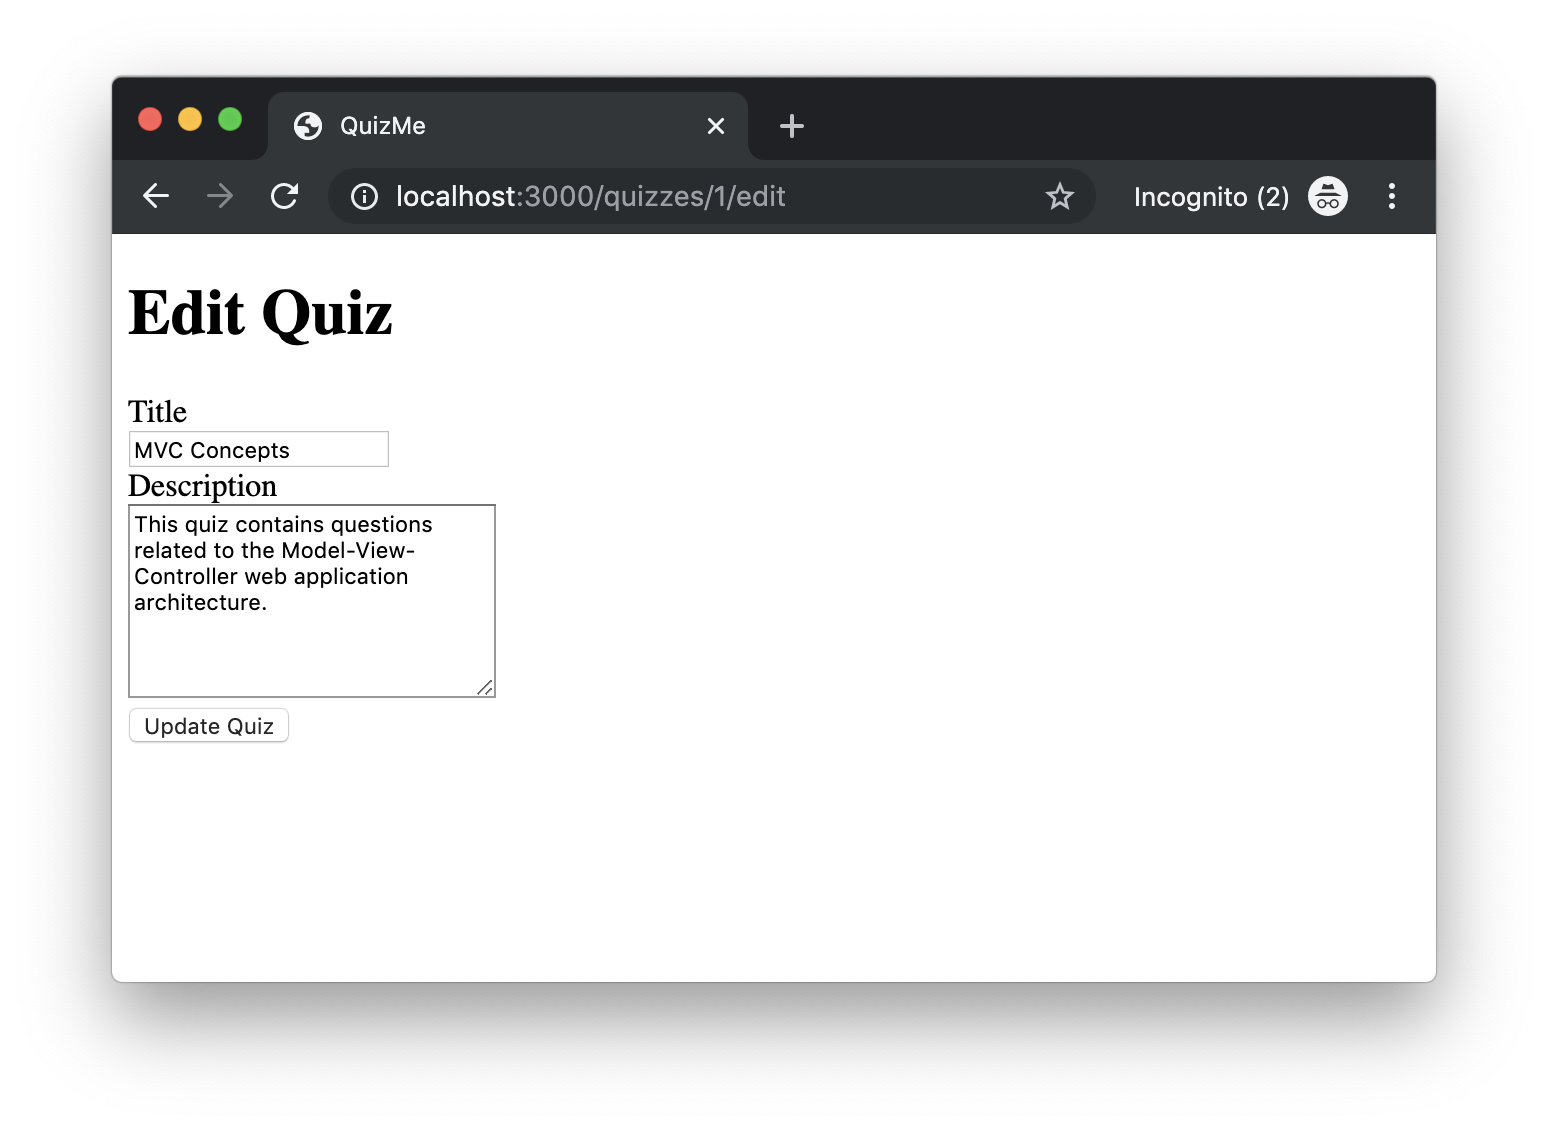
Quiz.Furthermore, we will be adding the standard CRUD resource pages for Quiz, depicted in Figures 2–5.

index page for Quiz. The "New Quiz" hyperlink goes to the new form for Quiz. The "🔎" hyperlink goes to the show page for the corresponding Quiz record. The "🖋" hyperlink goes to the edit page for the corresponding Quiz record. The "🗑" hyperlink deletes (via the destroy action) the corresponding Quiz record. Note that the description of each Quiz record is truncated such that only the first 75 characters are displayed.
show page for Quiz.
new form page for Quiz. Like the previous demo on forms for creating model records, submissions of the form are processed by a create controller action.
edit form page for Quiz. Like the previous demo on forms for updating model records, submissions of the form are processed by a update controller action.We divide the implementation of these features into two tasks:
- Creating the
Quizmodel class, including attribute validations. - Creating
Quiztest fixtures and model tests. - Creating the CRUD resource pages and actions for
Quiz.
1. Creating the Quiz Model Class
For this part, we will perform the following steps to create the new model class, Quiz, along with corresponding model validations and tests.
-
Generate the
Quizmodel class along with a corresponding database migration, like this:rails g model Quiz title description:textIn the above command, we did not need to specify the datatype for
titleabove, becausestringis the default datatype for model attributes (and that’s what we wanted). -
Run the newly generated migration to update the database schema by running the following command:
rails db:migrate -
In the
Quizmodel class, addpresencevalidations fortitleanddescription, like this:validates :title, :description, presence: true
2. Creating Quiz Test Fixtures and Model Tests
-
In
test/fixtures/quizzes.yml, add a valid test fixture for theQuizmodel, like this:one: title: Rails Concepts description: This quiz covers basic Rails programming concepts. -
In
test/models/quiz_test.rb, add a test for all fixtures to verify that they are valid, like this:test "fixtures are valid" do quizzes.each do |q| assert q.valid?, q.errors.full_messages.inspect end end -
Also, add tests to verify that
titleanddescriptionmust be present (notnil, not an empty string, and not a string containing only whitespace characters) in order for aQuizobject to be valid, like this:test "title presence not valid" do q = quizzes(:one) q.title = nil assert_not q.valid? q.title = "" assert_not q.valid? q.title = "\t" assert_not q.valid? end test "description presence not valid" do q = quizzes(:one) q.description = nil assert_not q.valid? q.description = "" assert_not q.valid? q.description = "\t" assert_not q.valid? end -
Confirm that the tests work and are passing by running the following command:
rails testYou should see
0 failuresand0 errors. If you do see failures or errors, then there is a bug in the code that needs fixing.
3. Creating Quiz Seed Data
For this task, we will seed the database with example data using our newly created model class, as per the steps below.
-
Add a couple of
Quizseeds at the top of theseeds.rbfile, like this:quiz1 = Quiz.create!(title: 'MVC Concepts', description: 'This quiz covers concepts related to the Model-View-Controller web application architecture.') quiz2 = Quiz.create!(title: 'Rails Concepts', description: 'This quiz covers concepts related to web application development using the Ruby on Rails platform.') -
Seed the database using the following command:
rails db:seed:replantAlternatively, this command would also work:
rails db:migrate:reset db:seed
To confirm that the data was seeded correctly, use pgAdmin to inspect the database, or use the Rails console, for example, to run Quiz.all and inspect the output.
4. Creating Basic CRUD Pages for Quiz
Now that we have seeded the database with Quiz records, we will now add the basic CRUD pages to enable users to view and manipulate Quiz records, as per the following steps.
Although the text below won’t mention it, it is highly recommended that you test your code frequently as you’re creating it. In particular, after you implement each page, running the web server to try out the page is a very good idea. That way, your code will “fail fast”, helping you to catch bugs quickly and making it easier to correct them.
-
Create a
QuizzesControllerby entering this command:rails g controller Quizzes -
Create the standard RESTful routes (
index,show,new/create,edit/update, anddestroy) for theQuizmodel class by adding the following code to theroutes.rbfile:# Quiz resources get 'quizzes', to: 'quizzes#index', as: 'quizzes' # index get 'quizzes/new', to: 'quizzes#new', as: 'new_quiz' # new post 'quizzes', to: 'quizzes#create' # create get 'quizzes/:id/edit', to: 'quizzes#edit', as: 'edit_quiz' # edit match 'quizzes/:id', to: 'quizzes#update', via: [:put, :patch] # update get 'quizzes/:id', to: 'quizzes#show', as: 'quiz' # show delete 'quizzes/:id', to: 'quizzes#destroy' # destroyUsing standard RESTful routes is a very common practice, so Rails provides a shortcut to these resource routes for any model object. If you are comfortable with the form of these routes, especially the URL parameters and named path helpers, you can replace the above code with:
resources :quizzes -
Create the
indexcontroller action and view to display all quizzes.The
indexcontroller action should look like this:def index # get all quiz objects quizzes = Quiz.all # display index view respond_to do |format| format.html { render :index, locals: { quizzes: quizzes } } end endThe corresponding
index.html.erbview should look like this:<h1>Quizzes</h1> <%= link_to 'New Quiz', new_quiz_path %> <% quizzes.each do |quiz| %> <div id="<%= dom_id(quiz) %>"> <br> <p> <%= quiz.title %> <%= link_to '🔎', quiz_path(quiz) %> <%= link_to '🖋', edit_quiz_path(quiz) %> <%= link_to '🗑', quiz_path(quiz), method: :delete %> </p> <p> <%= truncate quiz.description, length: 75, separator: ' ' %> </p> </div> <% end %>Note that the
truncatemethod is a handy way to shorten a long string when you want only a brief summary. In particular, the method will return the firstlengthcharacters of a string followed by an ellipsis (“...”). -
Add a link to the
indexpage forQuizabove the About and Contact links on the Home page, like this:<p><%= link_to "Quizzes", quizzes_path %></p> -
Create the
showcontroller action and view to display a single quiz.The
showcontroller action should look like this:def show # find a particular object quiz = Quiz.find(params[:id]) # display the object respond_to do |format| format.html { render :show, locals: { quiz: quiz } } end endThe
show.html.erbview should look like this:<h2><%= quiz.title %></h3> <p><%= quiz.description %></p> -
Create the
new/createpages and actions forQuiz.The
new/createcontroller actions should look like this:def new # make empty quiz object quiz = Quiz.new # display new view respond_to do |format| format.html { render :new, locals: { quiz: quiz } } end end def create # new object from params quiz = Quiz.new(params.require(:quiz).permit(:title, :description)) # respond_to block respond_to do |format| # html format block format.html { if quiz.save # success message flash[:success] = "Quiz saved successfully" # redirect to index redirect_to quizzes_url else # error message flash.now[:error] = "Error: Quiz could not be saved" # render new render :new, locals: { quiz: quiz } end } end endThe
new.html.erbview should look like this:<h1>New Quiz</h1> <%= form_with model: quiz, url: quizzes_path, method: :post, local: true, scope: :quiz do |form| %> <div> <%= form.label :title %><br> <%= form.text_field :title %> </div> <div> <%= form.label :description %><br> <%= form.text_area :description, size: "27x7" %> </div> <%= form.submit "Add Quiz" %> <% end %> -
Create the
edit/updatepages and actions forQuiz.The
edit/updatecontroller actions should look like this:def edit # object to use in form quiz = Quiz.find(params[:id]) respond_to do |format| format.html { render :edit, locals: { quiz: quiz } } end end def update # load existing object again from URL param quiz = Quiz.find(params[:id]) # respond_to block respond_to do |format| # html format block format.html { # if quiz updates with permitted params if quiz.update(params.require(:quiz).permit(:title, :description)) # success message flash[:success] = 'Quiz updated successfully' # redirect to index redirect_to quizzes_url else # error message flash.now[:error] = 'Error: Quiz could not be updated' # render edit render :edit, locals: { quiz: quiz } end } end endThe
edit.html.erbview should look like this:<h1>Edit Quiz</h1> <%= form_with model: quiz, url: quiz_path, method: :patch, local: true, scope: :quiz do |form| %> <div> <%= form.label :title %><br> <%= form.text_field :title %> </div> <div> <%= form.label :description %><br> <%= form.text_area :description, size: "27x7" %> </div> <%= form.submit "Update Quiz" %> <% end %> -
Create the
destroycontroller action forQuiz, like this:def destroy # load existing object again from URL param quiz = Quiz.find(params[:id]) # destroy object quiz.destroy # respond_to block respond_to do |format| # html format block format.html { # success message flash[:success] = 'Quiz removed successfully' # redirect to index redirect_to quizzes_url } end end
We now have a working Quiz model class and CRUD resource pages. In the next demo, we will make the application more interesting by giving each Quiz object an associated set of McQuestion model objects.